Have you ever wondered what another person
around you was saying? Or have you lived with a family member that didn’t speak
English? Have you ever wanted to learn another language than what you speak
English, Chinese, Japanese, Indian, etc. Well, if you have wondered theses
things I can help you. I have learned it is easier to learn Sign Language with
a reason to.
About
a year ago, I learned that a girl I know named Kate an 8 yr. old I know, she is
deaf. I know her because her mom and my mom are best friends. I see her a lot
and, hang out with her and her sister Meigan. She was like a really good friend
before I knew she could barely communicate to her mom. I was so sad I thought
she was doing great. So I decided I will help her. I will learn Sign Language I
will become one of her only friends.
Next,
time I saw her I told her (in Sign) “I will try to learn Sign Language so I can
talk to you.” I promised her. Kate looked very happy to have a friend. Who
could talk to her when not many people can. So I will learn Sign Language I
have never broken a promise and I never will. I will not break my promise to
her. Now I can talk to her and I feel like she’s my little sister. We hang out
a little twice a week and I might start helping her on her bible verses she has
been learning.
Every Wednesday I go up to her and ask if
she wants a piggyback ride (she usually does). She loves it when I spin her
around, and make silly jokes or comments. My life has changed because of this remarkable
little girl. She is a blessing from heaven. God put her in my rode of life
because he knew she would bless my heart.
I now know things I never knew about her. Like
her favorite color for instance is: purple she loves it and
wear purple a lot, what she likes to wear: purple
clothes, princess clothes, etc. what’s her favorite thing to do: play with
dolls, my little ponies, barbies , etc.
Learning
Sign Language was a blessing. I know God planned it. He has been planning an amazing experience for
me and hopefully her too. She has grown in my heart and she is a gift from God
to me.
Peach Pineapple Smoothie(Makes 4 servings) What You Need1 banana, peeled and halved 1 ½ cups chopped frozen peaches ½ cup fresh pineapple chunks ⅓ cup vanilla yogurt ½ cup orange juice What to DoCombine ingredients in a blender and mix until smooth. Pour into four glasses and garnish with whipped cream and fresh fruit.
Have you ever heard of a BBC British show called Doctor Who. It's about this time Lord who everyone calls "The Doctor" . But, so few know that he is a Time Lord. An alien from space. He is the last of his kind (so they say). If you have BBC or Amazon instant video or Netflix, and of course you like Sci-Fi thenyou should try this amazing show.
There are so many quotes for you who love Doctor Who:
“There's something that doesn't make sense. Let's go and poke it with a stick." - The Doctor”
“Bow ties are cool.”
- The Doctor
“Amy Pond: 'I thought... well, I started to think you were just a madman with a box.' The
Doctor: 'Amy Pond, there's something you better understand about me,
'cause it's important and one day your life may depend on it. [He
Smiles] I am definitely a madman with a box.”
-Doctor Who
“The Doctor: 'You know when grown-ups tell you everything's going to be
fine, but you really think they're lying to make you feel better?' Amelia: 'Yeah...' The Doctor: 'Everything's going to be fine.”
-Doctor Who
“The Doctor: Don't blink. Don't even blink. Blink and you're dead. Don't turn your back. Don't look away. And don't blink.”- The Doctor
“The Doctor: [aiming gun at the ceiling] Didn't anyone ever tell you?
There's one thing you never put in a trap if you're smart. If you value
your continued existence, if you have any plans about seeing tomorrow,
there's one thing you never, ever put in a trap. Angel Bob: And what would that be, sir? The Doctor: Me. [fires]”
Guys (or really anyone reading), I thought to my self we should start doing test on our favorite shows so . I know your thinking whats the catch . Well, the catch is you have to say your favorite show ( like Doctor Who , Psych, The Mentleist,etc.) on the comments and maybe make a quiz on my blog out of your answer.
Saturday, September 15, 2012
hey I'm sorry I haven't made a post soon I will do LONG POST SOON i WILL TRY TO
Have you ever thought this ?: "there are so many people , we just pass by every day but, what happened at the beginning of time who made earth it couldn't just make it self neither can the rest of the planets so what happened back then."
Well, there was someone there before time, before Earth, before anything. You are probably wondering who,what. It was God He has always been .
Note from PW: On tomorrow’s Food Network episode,
I make homemade glazed doughnuts for Marlboro Man, the kids, Josh, and
Pete. To make it easy, I’m bringing the doughnut recipe up to the front.
These are delicious, guys! Give ‘em a try sometime.On the episode, I make the doughnuts a
little smaller than these, circumference-wise. I also roll the dough a
little thinner, which results in a smaller doughnuts. I tend to like
smaller doughnuts because then I can eat more, but you can make them
whatever size you’d like! Originally posted February 2010.
Keep in mind that this might take a time or two of making them before
the process feels totally comfortable. I tried to keep the instructions
below as specific and precise as I could. The printable recipe at the
bottom of the page has numeric instructions so as to leave no doubt. But
yeast, as we all know, can have a mind of its own sometimes—so can the
weather, with its humidity or dryness. So if at first you don’t
fricassee, fry fry a hen…okay?
But do give them a try sometime. Doughnuts are fun to make!
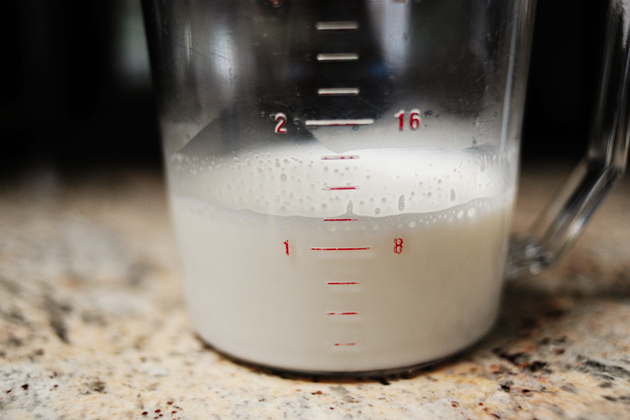
Begin by measuring 1 1/8 cup of whole milk. Just go between the 1 cup and 1 1/4 cup lines.
Yes, I’m aware you didn’t need me to explain that to you.
Warm up the milk so that it’s warm to the touch, but not hot. If you
have a thermometer, make sure the milk is between 105 and 115 degrees F.
I usually err on the side of too warm, but that can be a little
dangerous.
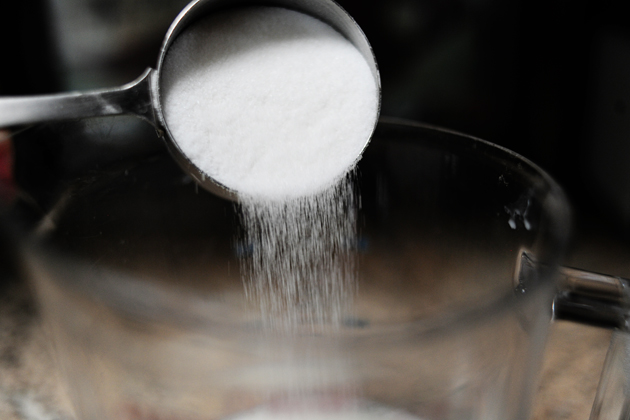
Add 1/4 cup sugar to the milk. Stir it around a few times.
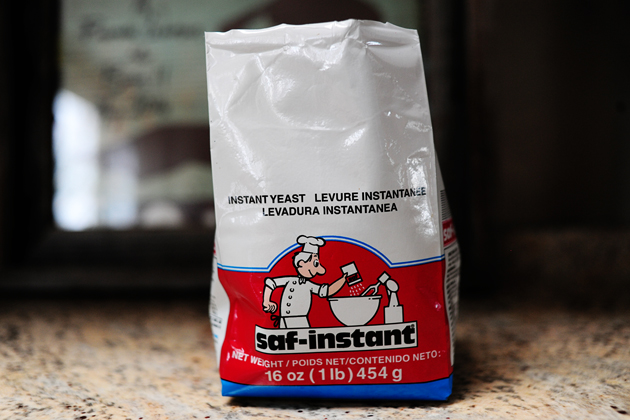
Now, you can certainly use active dry or rapid rise yeast…but I have had great success with this SAF Instant Yeast,
which is sold at my local smalltown grocery store. It’s good stuff,
guys. And this one-pound bag, which could make around 90 to 100 loaves
of bread, costs about six dollars.
Again, though, if you’d like to use whatever yeast you have in your house, feel free to substitute active dry or rapid rise.
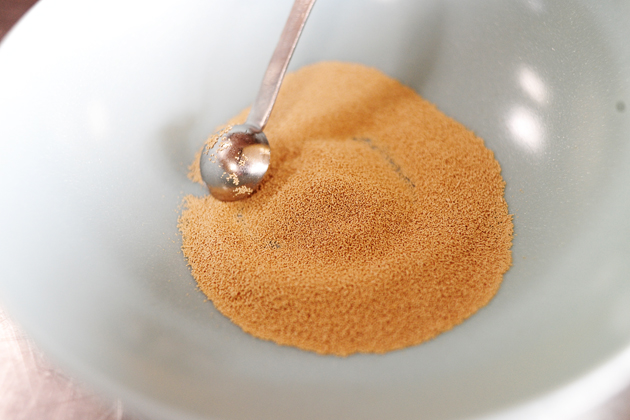
Measure
2 1/4 teaspoons of the yeast granules into a bowl. This is the same
quantity that comes in one individual packet of yeast, so the two can be
easily interchangeable.
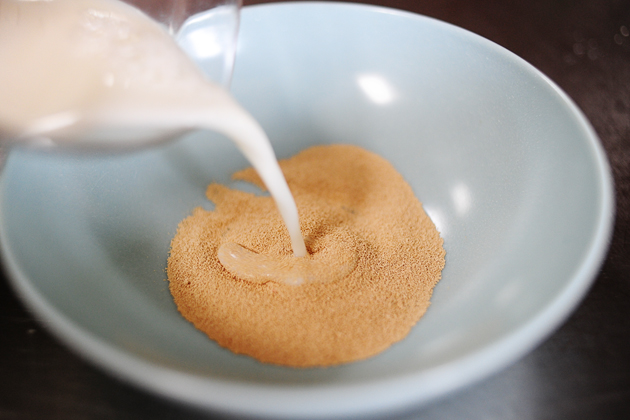
Pour the warm milk/sugar mixture into the bowl with the yeast.
Stir it around just a couple of times, then let it sit for several minutes while you prepare the other ingredients.
NOTE: It is NOT necessary to dissolve instant yeast before adding it
to the dry ingredients. I like to do it in this recipe, just to maintain
a consistent process should I ever have to use a different variety of
yeast…and the recipe simply works this way.
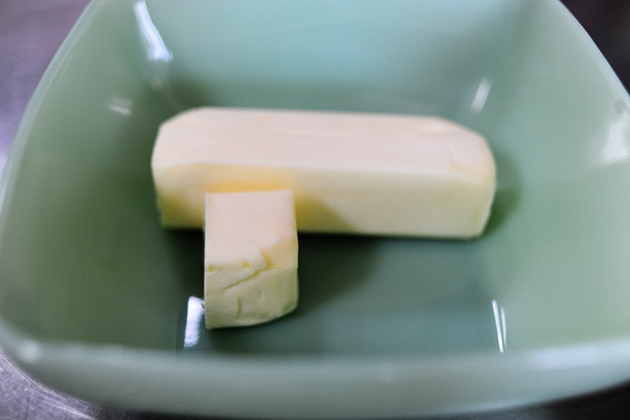
Next, add 1 1/4 sticks of unsalted butter to a separate bowl.
*This is one of the rare cases I use unsalted butter. It just seems to work better in this recipe.
Melt
the butter in the microwave until it’s just barely melted, then stir
the butter to finish the melting process. The reason I do it this way is
that I don’t want the melted butter to be too hot. I’m going to add it
to beaten eggs in a sec.
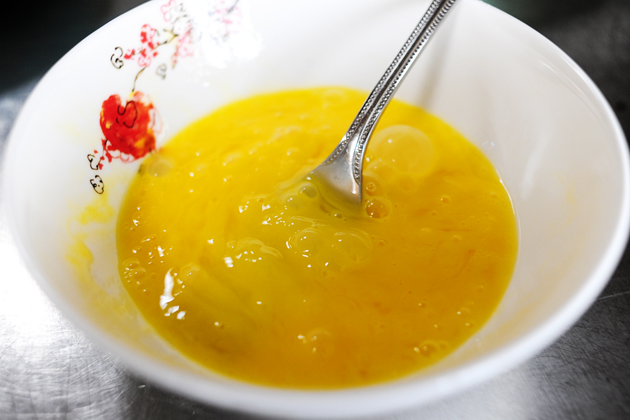
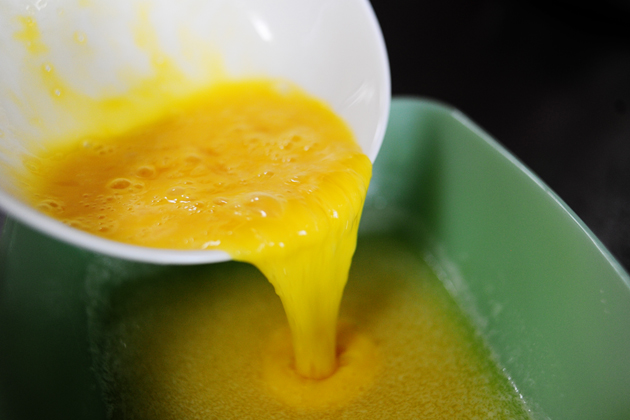
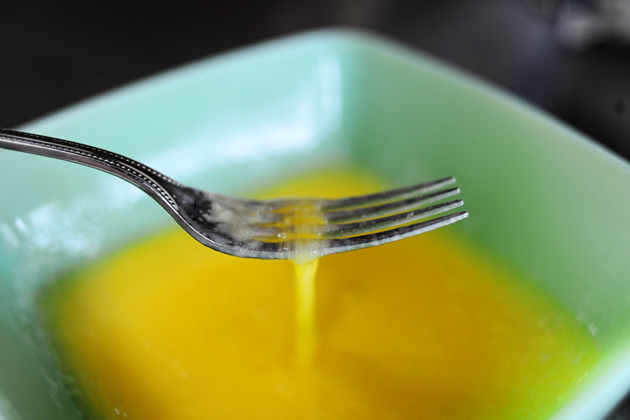
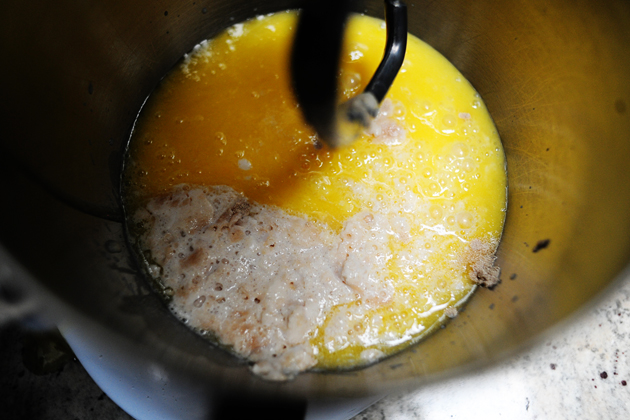
Crack a couple of eggs into a separate bowl…
Then beat them senseless with a fork.
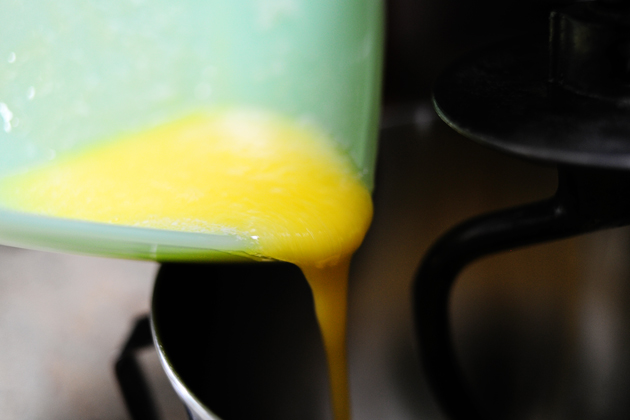
Next, making sure the butter’s not overly warm first, pour the beaten eggs into the butter.
Stir the mixture with the fork until it’s all combined.
Now,
pour the egg/butter mixture into the bowl of an electric mixer, with
the mixer fitted with the dough hook attachment. Turn the mixer on speed
3 (if it’s KitchenAid), or medium-low.
*NOTE: If you do not have an electric mixer/dough hook attachment, just pour this into a regular large mixing bowl.
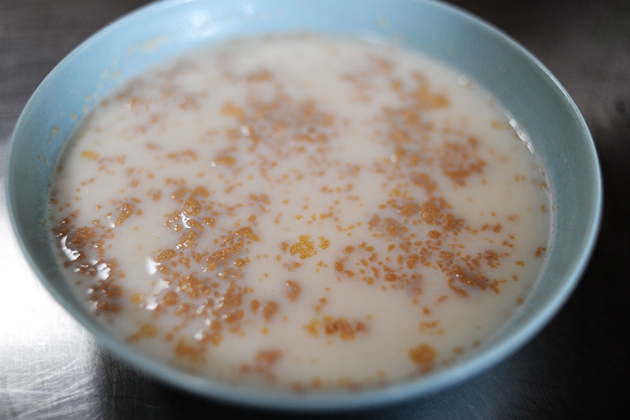
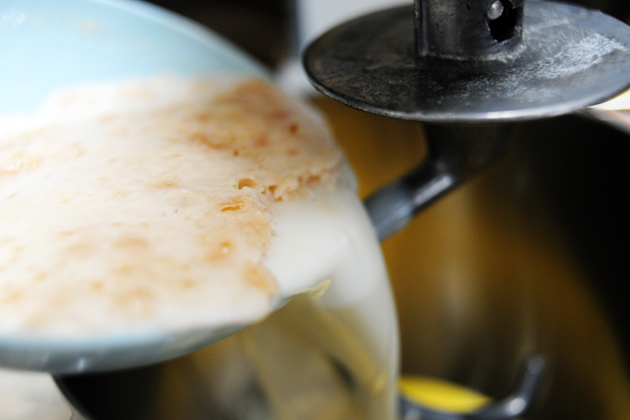
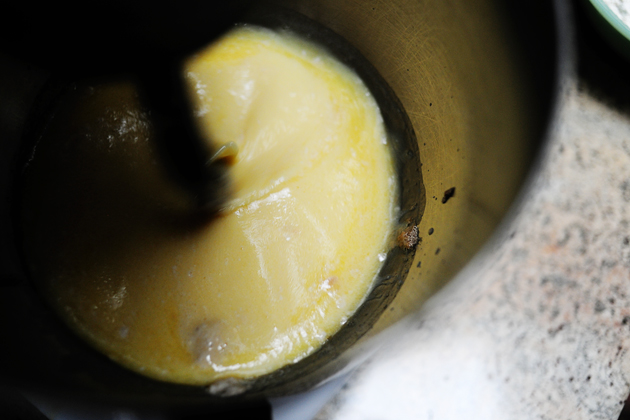
With
the mixer running, grab the yeast/milk mixture, which, eight minutes
later, is now totally freaky and bubbly and weird looking.
Freaky, bubbly, and weird: when it comes to yeast, these are all very desirable attributes.
Carefully pour the mixture into the bowl of the mixer…
Plop.
Allow the mixer to gently stir the ingredients together.
*NOTE: If you aren’t using a mixer, just stir the wet ingredients gently with a whisk for about a minute.
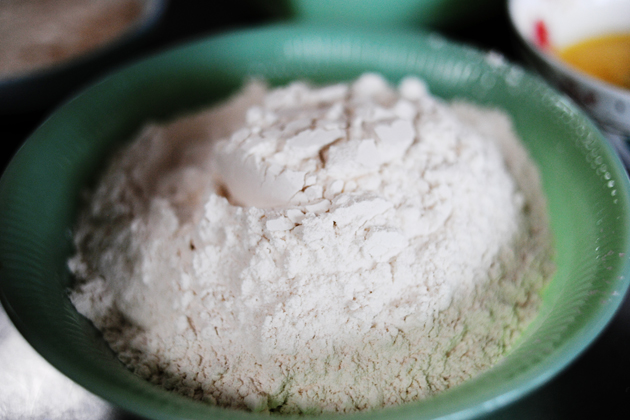
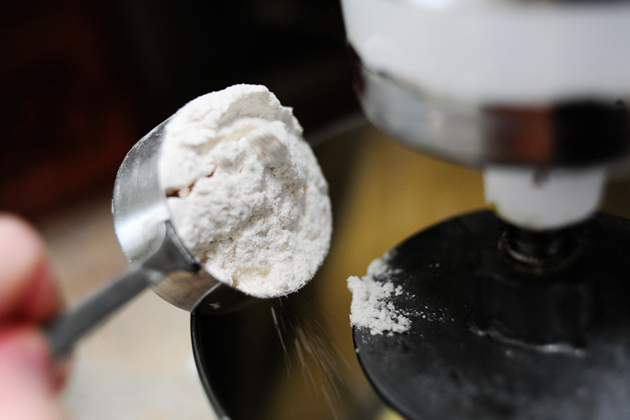
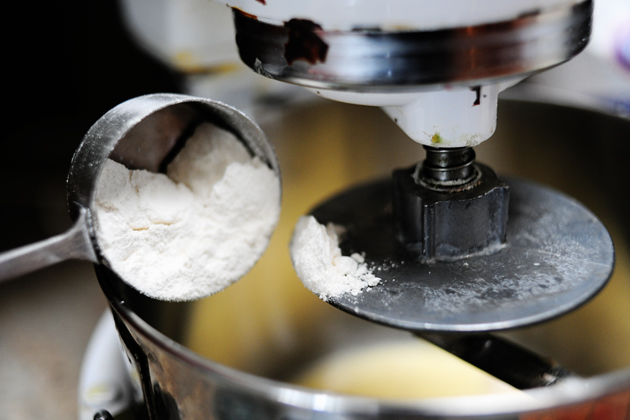
Let
the mixer run and keep stirring up the wet ingredients while you
measure out 4 cups all-purpose flour. This is where I’ve really done
some experimenting (with cake flour, self-rising flour, etc.) and wound
up coming back to the regular stuff. Sometimes simple is best, baby.
Add 1/4 teaspoon salt to the flour and stir to combine.
I seriously can not explain the freaky pink alien hand in this photo.
It’s the lens…or the lighting…or maybe I really am just a freaky pink
alien and I’ve tried to deny it to myself all these years. Either way,
try not to be disturbed. Focus on the doughnuts.
Make sure the wet mixture looks nice and combined, then begin adding the flour mixture in 1/4 to 1/2-cup increments…
Mixing for several seconds after each addition.
Keep this up…
Until all the flour has been added.
*NOTE: If you’re not using a mixer, just add flour to the wet
ingredients in increments, stirring and/or kneading after each addition.
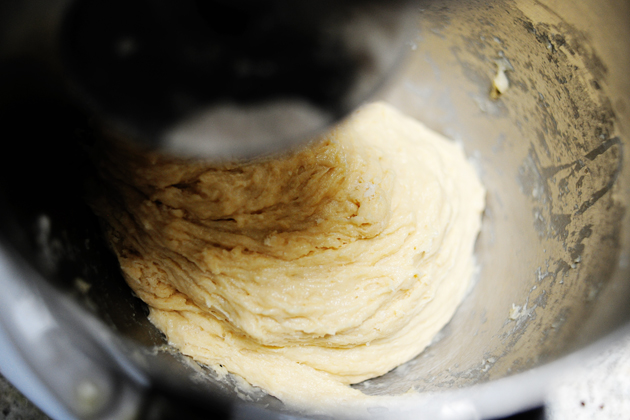
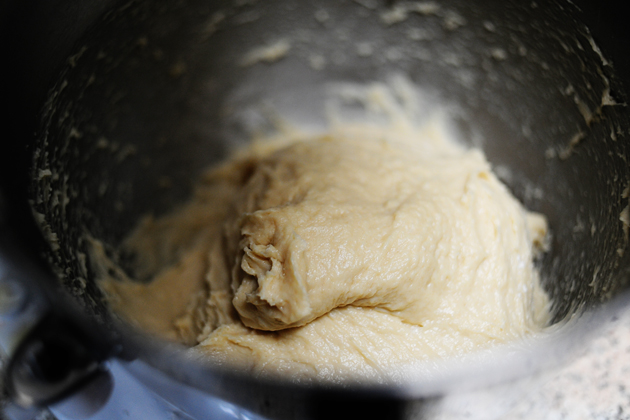
Next,
just let the mixer go for a good 8 to 10 minutes. You’ll hear the
satisfying sound of the dough slapping against the sides of the metal
bowl…ahhh. There’s not a more satisfying sound in all the world.
Except maybe those grunting sounds a newborn baby makes for the first two or three weeks of his life.
But I can’t let myself go there. That’s more dangerous than a doughnut.
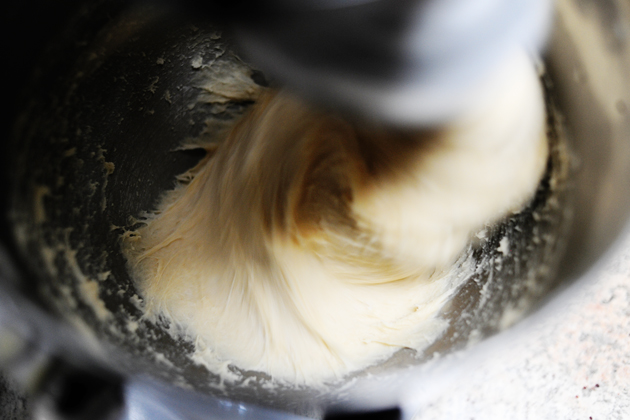
Stop
the mixer, then scrape the bottom of the bowl and turn the mixer back
on for one more minute. Then turn off the mixer and remove the hook
attachment…
…Leaving the dough in the bowl for a few minutes.
*NOTE: If you’re not using a mixer, just knead the dough gently for about 5 to 8 minutes, then let it sit and rest.
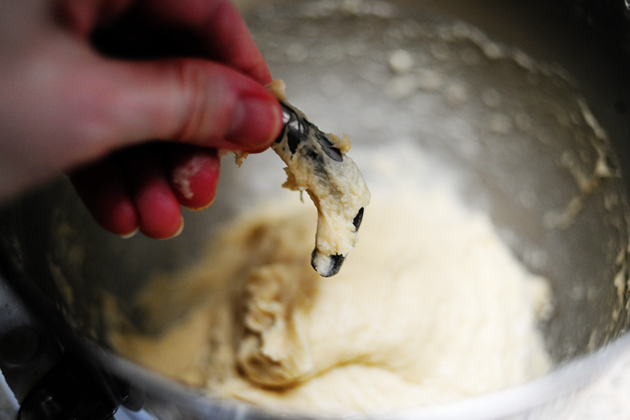
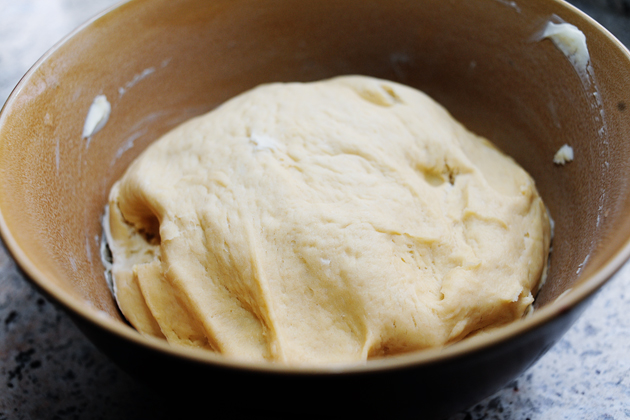
And THAT’S IT for the dough. All you do now is put the dough into a
lightly greased (with a little canola oil or butter) bowl, toss it
around to coat the surface of the dough, then cover with plastic wrap
(not foil; important!) and keep in the refrigerator for several hours or
overnight.
This is the next morning.
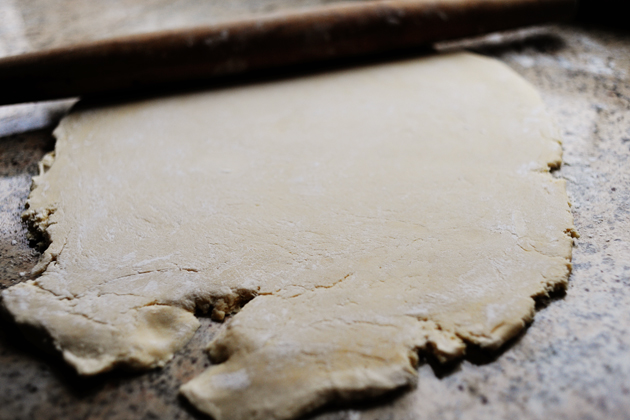
Now, right away, while the dough is still cold (so it can easily be rolled and handled), lightly flour your rolling surface…
Then plop the dough upside down onto the surface.
Then
flour the top and roll out the dough to between a 1/4 and 1/2 inch
thickness, lightly flouring as you go along if the pin starts to stick.
Now, lightly flour a baking pan. You can line it with waxed paper or a baking mat first, but you don’t have to.
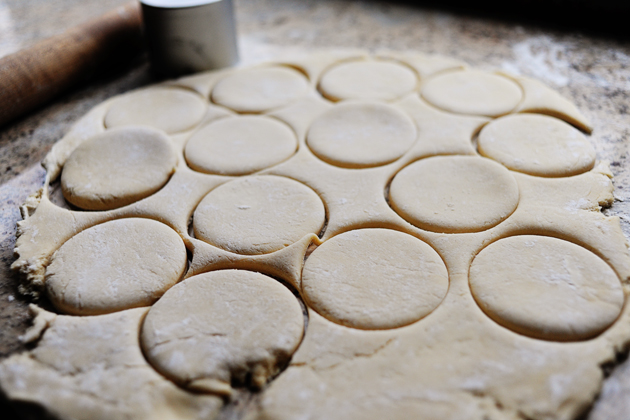
Now,
ideally you would now use a 3-inch (maximum) doughnut cutter, which is a
single cutter that also cuts a hole in the middle of each round. I used
to have one, but I’m afraid it’s now living at the bottom of our pond,
right along with my favorite slotted spoon and about a hundred other
household items my boys have used in their various attempts to catch sea
monsters.
I don’t want to talk about it.
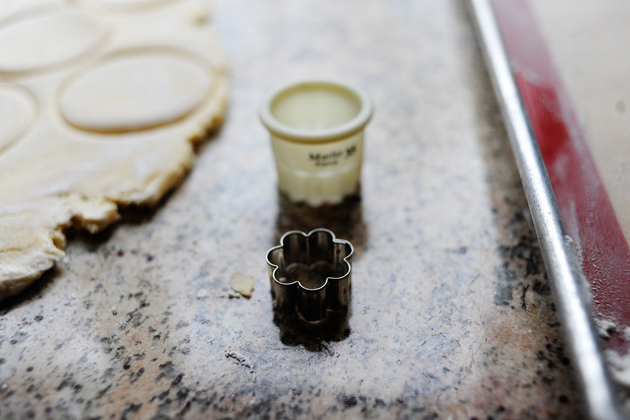
Next,
finding that I was also missing my smaller (1.5 inch) biscuit cutter, I
had to choose between these two little fluted numbers.
Buttheads.
My boys, not the cutters.
**I’m missing a couple of sequence shots here because…well, because I’m a freak, but basically here’s what went on:
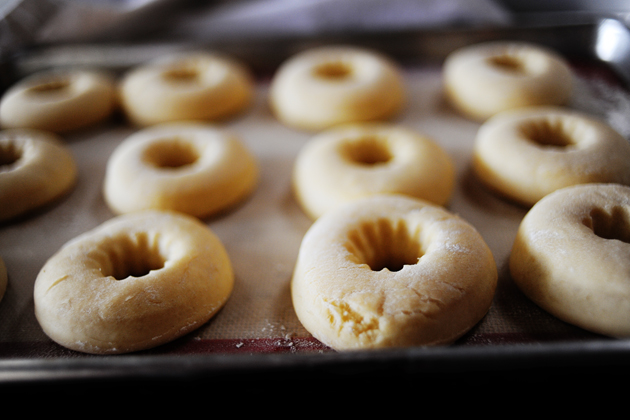
1. Cut a center hole in the larger rounds using a 1 to 1.5-inch cutter.
2. Transfer the doughnuts and the doughnut holes to the floured baking sheet
3. Repeat with the dough scraps until all/most of the dough has been used.
4. Cover the doughnuts and holes with a large tea towel and LET RISE IN A WARM PLACE FOR AN HOUR-PLUS.
IMPORTANT
I can not emphasize enough the importance of providing the doughnuts
with a warm, draft free place to rise. The dough has started out cold,
so you really need to aggressively make sure they have the proper
environment for rising. My kitchen is extremely drafty—I have four large
windows that have seen better days—so I have to go on the offense by
heating up my large griddle, then turning it off, then placing my pans
of doughnuts on the warm griddle. Now, you don’t want the pan on which
the doughnuts are sitting to actually heat up at all—that would mess up
the bottoms of the doughnuts. But you do need to really create a warm
environment so the doughnuts will rise adequately. How much the
doughnuts rise over the next hour is directly related to how light and
fluffy they’ll be…so do what you can!
This is after one hour of rising in a nice, warm place.
Compare the difference:
Risen, the doughnuts should not appear “solid”, but should really
look light—as if they’d collapse if you breathed on them. Feel free to
let them rise an additional 15 minutes or so if you think they need it.
Just always keep them covered with a light towel so the tops don’t dry
out.
Once
the doughnuts are risen, heat a pot of canola oil until it reaches 375
degrees. You’ve really gotta have a deep fry thermometer for this, as
the temperature of the oil is extremely important.
Ideally, the oil will remain between 375 and 380, 380 being a little on the hot side.
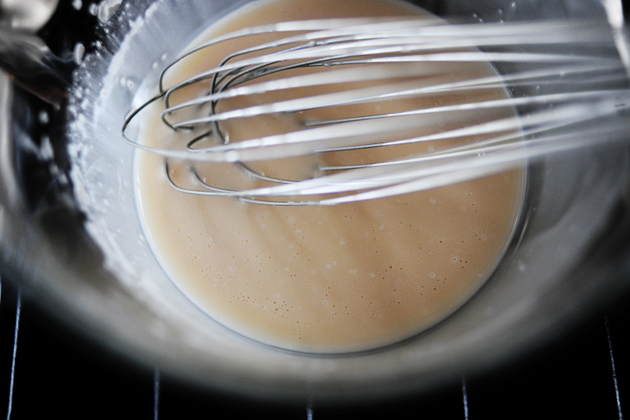
While
the oil is heating, make a quick glaze of powdered sugar, salt,
vanilla, and cold water or milk—or a combination of both. Whisk it
together until totally smooth.
NEXT: Make a nice, big bed of several paper towels stacked on top of one
another. We’ll need to use these to quickly absorb the oil after we
cook the doughnuts.
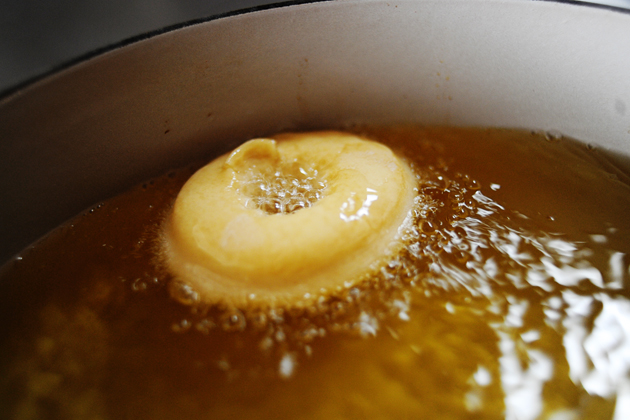
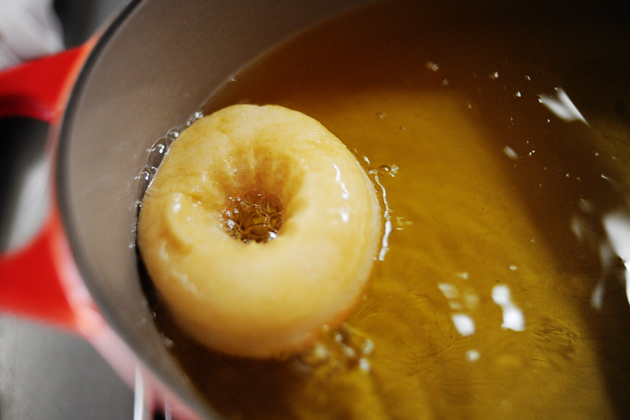
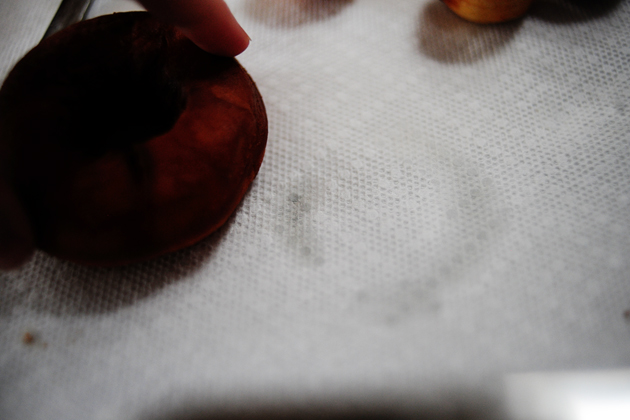
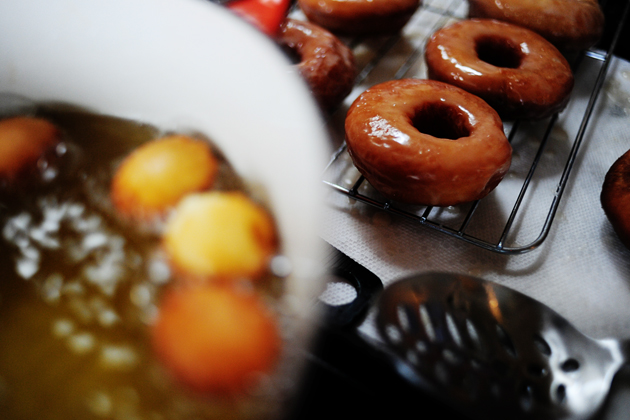
When
the oil has reach its temperature and evened out (i.e. isn’t getting
hotter by the second) drop in one doughnut first, just to get
comfortable with the process. Notice the little “smushed” area: this is
where I very gently looped my finger through the hole of the doughnut to
drop it into the oil—you can see how light and fragile the dough is.
That’s good!
Let it fry and bubble for about 45 seconds…
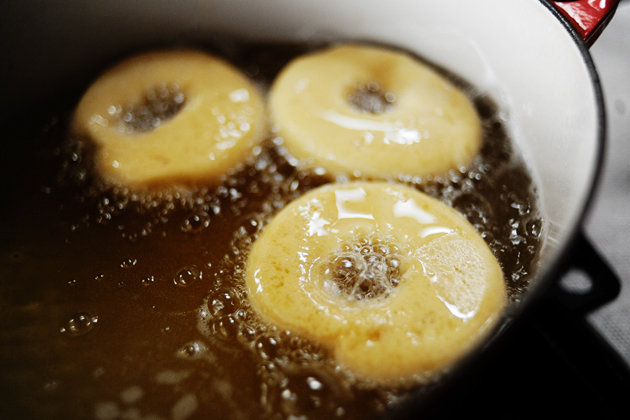
Then
use a slotted spoon to flip it over. See how brown it got in a very
short time? That’s why it’s best to start out cooking one at a time. And
keep monitoring your oil temp!
I’m bossy when it comes to doughnuts. I should go into business with our
doughnut guy in town. I think we’d be very happy together.
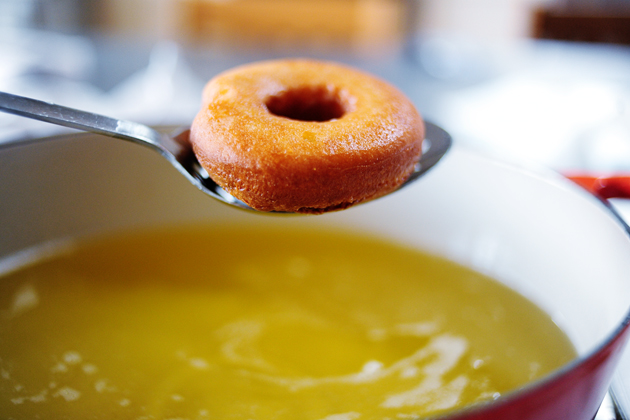
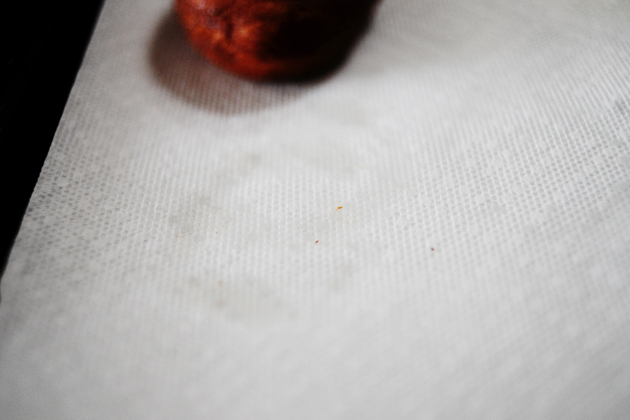
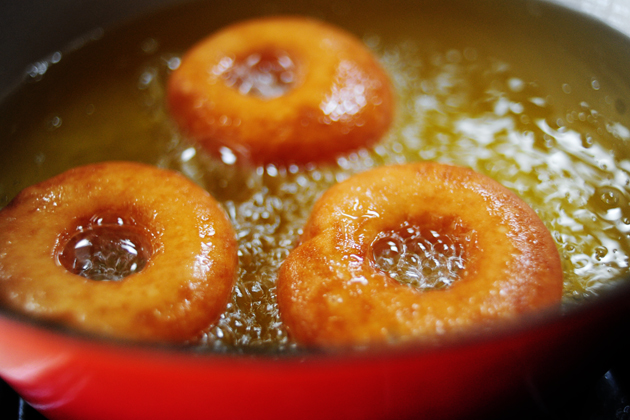
45 seconds into the second side, remove the doughnut with a slotted spoon, allowing as much oil to drip off as you can.
Place it on the stack of paper towels. Count to five, then flip it over onto a clean part of the paper towels.
Continue
doing this over the first 30 seconds or so of the doughnut’s life,
trying to get as much oil onto the paper towels—and off of the
doughnut—as you can.
Think
of it this way: whatever oil winds up on the paper towel does not wind
up on/in the doughnut. It’s a mathematical certainty.
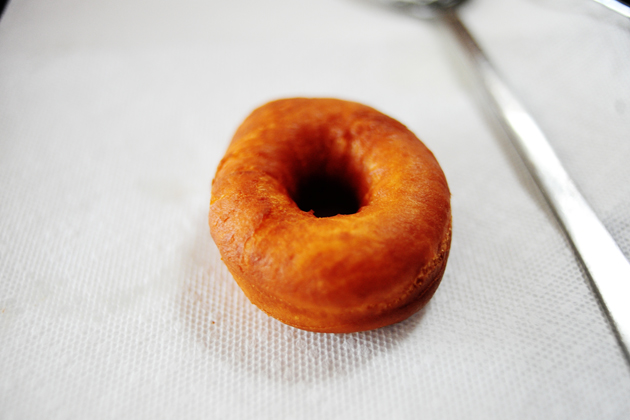
Continue this process, frying one to three doughnuts at a time…
Until they’re nice and golden brown.
Drain them on the paper towels immediately after removing them from the oil.
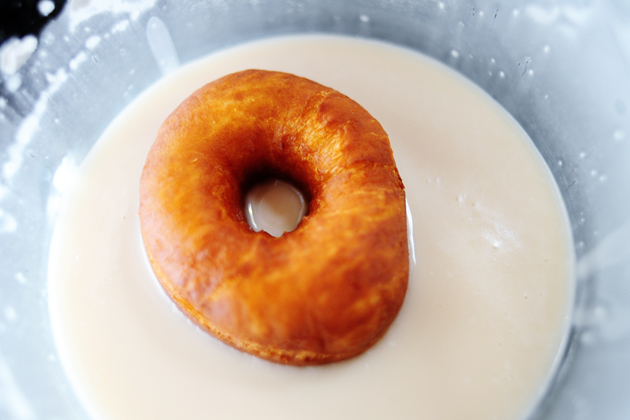
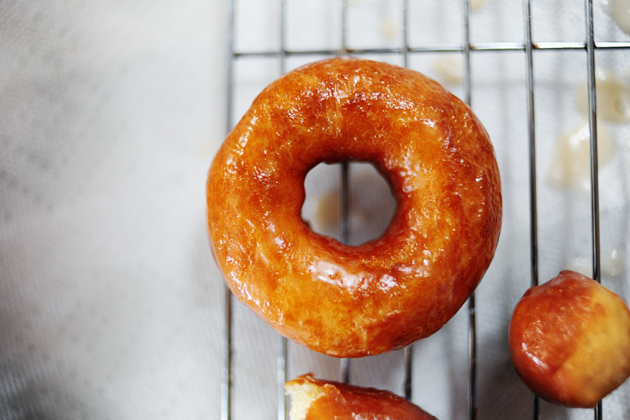
Then,
after the doughnuts have been drained, drop them one by one into the
glaze. Submerge them a little more than halfway deep, then remove them
and turn them over. (Note: you may dip the doughnuts twice if you like;
see examples below.)
Let
them sit on a cooling rack for a little bit. The glaze will drip down
and start to set a bit, and the doughnuts will just get more delicious
by the second.
The “chocolate” doughnut you see in the back row is actually a
regular doughnut that cooked a little too long because I let the oil get
too hot. It happens.
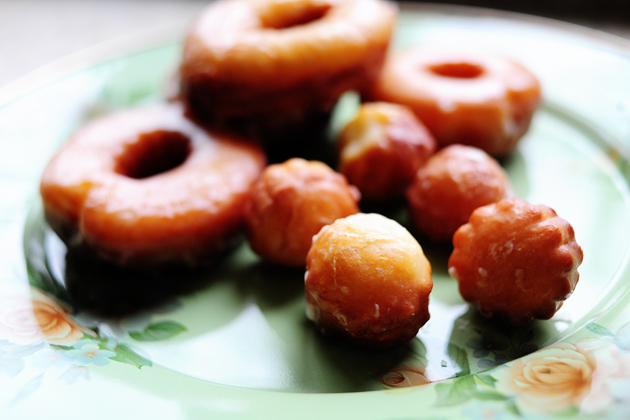
Next,
after all the doughnuts are cooked, throw in several doughnut holes at a
time, turning them over after about 25 to 30 seconds.
Okay, that’s it. I’m officially hungry.
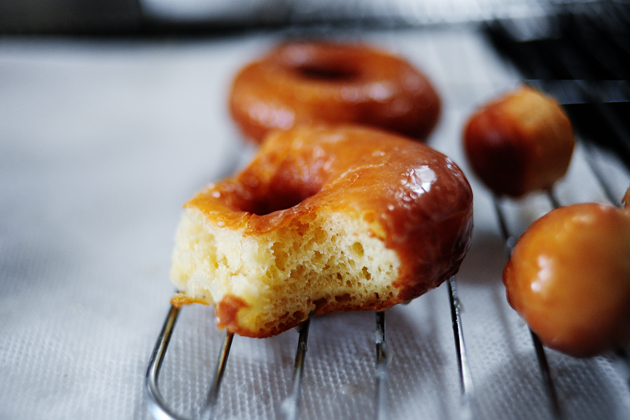
Now that is one yummy-looking doughnut.
But doughnuts are not about looks.
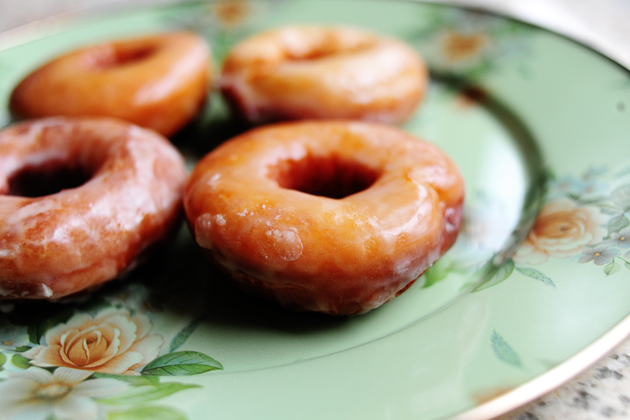
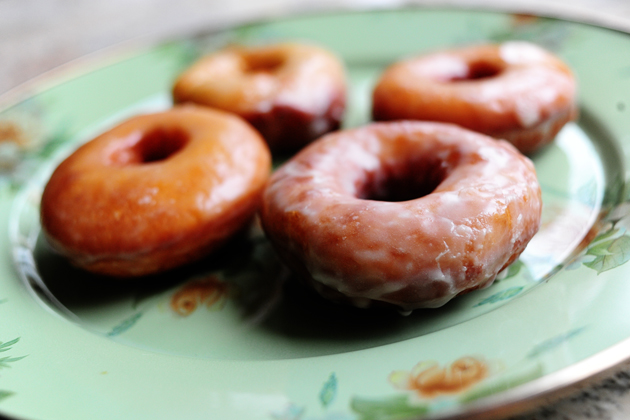
Ahhh. Behold the beauty of a plate of doughnuts.
And back to the glaze: this doughnut was dipped once.
This
doughnut was dipped twice. A little gloopier and messier, but very
sticky and delicious. Whether you single- or double-dip the doughnuts is
strictly a personal preference.
And whether you eat one doughnut or seven is matter to discuss with your maker.
And your doctor.
Enjoy these!
Recipe: Homemade Glazed Doughnuts
|
|
|
Ingredients
Doughnuts
1-1/8 cup Whole Milk, Warm
1/4 cup Sugar
2-1/4 teaspoons (one Package) Instant Or Active Dry Yeast
2 whole Large Eggs, Beaten
1-1/4 stick Unsalted Butter, melted
4 cups All-purpose Flour
1/4 teaspoon Salt
Shortening
GLAZE
3 cups Powdered Sugar
1/2 teaspoon Salt
1/2 teaspoon Vanilla
1/2 cup Cold Water Or Milk
Preparation Instructions
To Make the Dough:
1. Make sure milk is nice and warm, but not overly hot.
2. Add sugar to milk. Stir to dissolve.
3. Add yeast into a small bowl.
4. Pour milk/sugar mixture over yeast. Stir gently, then let sit for 10 minutes.
5. Melt butter in separate bowl until butter is almost melted. Stir to finish melting so butter won't be overly hot.
6. Add beaten eggs to melted butter, stirring constantly to make sure the butter's not too hot for the eggs.
7. Add the egg/butter mixture to the bowl of an electric mixer fitted with the dough hook.
8. With the mixer on 3 or medium-low speed, pour in the yeast mixture.
9. Allow the dough hook to stir this mixture for a couple of minutes, making sure it's thoroughly combined.
10. With the mixer still going, add helpings of the flour mixture in 1/4 to 1/2 cup increments until all the flour is gone.
11. Stop the mixer, scrape the bowl, then turn the mixer on the same speed for five whole minutes.
12. After five minutes, stop the mixer and scrape the bottom of the bowl.
13. Turn on the mixer for 30 seconds.
14. Turn off the mixer and allow the dough to sit in the bowl undisturbed for 10 minutes.
15. After 10 minutes, transfer dough to a lightly oiled bowl. Toss the
dough to coat, then cover the bowl with plastic wrap and place straight
in the fridge.
16. Refrigerate dough for at least 8 hours, or overnight.
To Make the Doughnuts:
1. Remove bowl from fridge and turn out dough onto a lightly floured surface.
2. Roll out to 1/4 to 1/3-inch thickness.
3. Using a 3-inch cutter, cut as many rounds as you can, then roll out remaining dough and cut as much as you can, etc.
4. Cut holes out of each round using a 1 1/2-inch cutter.
5. Place both doughnuts and holes on a floured baking sheet.
6. Cover with large tea towel and place in a warm place in your kitchen;
my kitchen is very drafty, so I have to briefly warm the griddle, then
turn it off and set the sheets on top to keep warm.
7. Allow doughnuts to rise undisturbed for at least 1 hour; 1 hour 15
minutes if necessary. Doughuts should be visibly puffier and appear to
be airy.
To Fry the Dougnuts
1. Heat plenty of vegetable shortening in a large pot until the
temperature reaches 375 to 380 degrees---do not let it get hotter than
380 degrees! 375 is ideal; keep the thermometer in the pan to
continually monitor.
2. One to two at a time, gently grab doughnuts and ease them into the
hot oil. Allow them to cook 1 minute on each side; they will brown very
quickly.
3. Remove doughnuts from the oil with a slotted spoon, allowing all oil to drip off.
4. Place doughnut immediately on several layers of paper towels. Count
to five, then flip it over onto a clean part of the paper towels. Count
to five, then flip it over again; the purpose, obviously, is to drain as
much grease as possible before it soaks into the doughnut.
5. Repeat with remaining doughnuts and holes. The holes will cook more quickly than the doughnuts; about 30 seconds per side.
6. Allow doughnuts to slightly cool.
To Glaze
1. Mix all glaze ingredients in a bowl until completely smooth.
2. One by one, dip doughnuts into the glaze until halfway submerged.
(Note: completely submerge doughnut holes, then remove with slotted
spoon.)
4. Remove from glaze, then turn right side up on a cooling rack over a cookie sheet (to catch dripping glaze.)
5. Serve warm if possible, or room temperature.